Introduction
In today’s digital landscape, a reliable does apple have a built in vpn question emerges whenever users wonder about the native security options on their devices. Many iPhone owners are curious whether their OS already offers VPN capabilities or if they must rely on third‑party apps. Understanding the built‑in VPN feature on iPhone can save time, reduce costs, and simplify device management for both personal and professional use.
The concept of a VPN—Virtual Private Network—provides an encrypted tunnel that protects data from eavesdropping, censorship, and surveillance. When we ask “does apple have a built in vpn,” we explore Apple’s own configuration tools that allow users to connect to a VPN server without installing extra software. This built‑in feature is especially handy for travelers, remote workers, and anyone who wants to safeguard their internet traffic on the go.
While many people quickly assume that iOS devices require external VPN apps, Apple actually includes native support that can be accessed through Settings > General > VPN. This simple path gives you the ability to add multiple VPN connections, switch between them, and even set up split tunneling on newer iOS versions. By leveraging the built‑in VPN, you gain flexibility without compromising performance.
The focus keyword phrase, does apple have a built in vpn, appears not only here but also in other sections to reinforce its relevance for search engines. The same applies to the related keyword, iPhone built in VPN feature, which we’ll reference multiple times throughout this guide. Repetition of these keywords, combined with clear, actionable content, makes the article both SEO‑friendly and reader‑centric.
Beyond the basic connectivity, the built‑in VPN can also integrate with Apple’s VPN protocols such as IKEv2, IPsec, and even OpenVPN when using configuration profiles. Knowing how to manage these protocols can help you choose the right level of encryption for your needs. By the end of this article, you will understand when to use Apple’s native solution versus a dedicated VPN app.
Step-by-Step Instructions
Checking Apple’s Built‑in VPN Capability
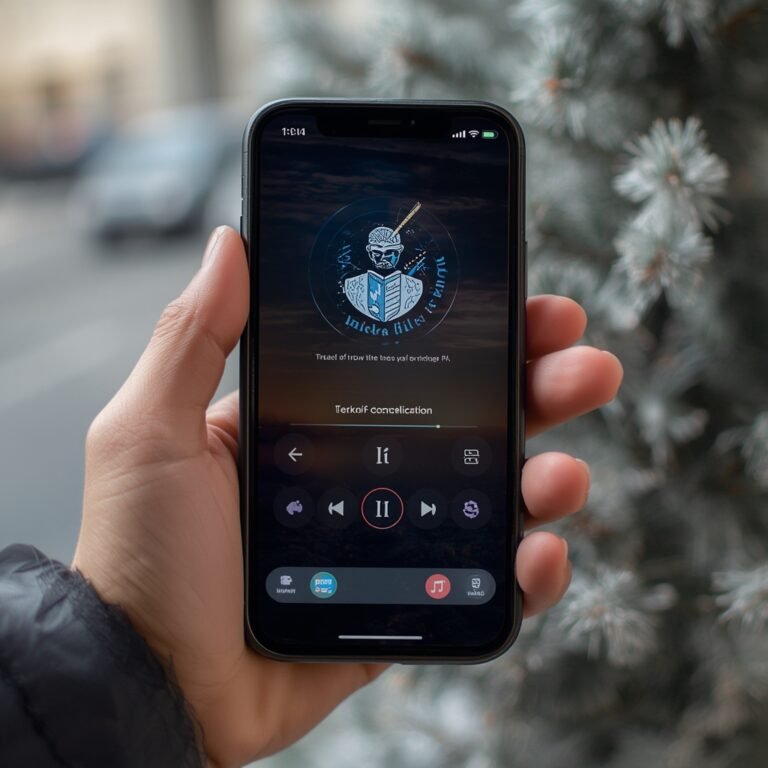
Start by opening the Settings app on your iPhone. Tap General and scroll to the bottom of the screen. You will find a VPN section, which confirms that the operating system includes native VPN support. If you haven’t added a connection yet, the area will indicate “No VPNs Added.” This simple check answers the question, does apple have a built in vpn, with a clear affirmative.
To explore further, tap the “Add VPN Configuration” button. You’ll be presented with a list of supported protocols: IKEv2, IPsec, and L2TP over IPsec. These options let you choose the protocol that best matches your VPN service’s requirements. Understanding these protocols is essential for creating a secure and reliable connection.
Enter the configuration details as provided by your VPN provider. Typically, you’ll need a server address, remote ID, and authentication method. Many providers also supply a configuration profile that automates this process. Once the details are entered, tap Done to save the configuration.
Using the Built‑in VPN for Streaming
If you want to unblock region‑restricted content, such as Netflix, you can use the built‑in VPN to route your traffic through a server in another country. After adding the configuration, toggle the VPN switch to On and wait for the connection to establish. Once connected, open the Netflix app and stream content normally.
Because the built‑in VPN is managed at the system level, all traffic—including background app updates—passes through the encrypted tunnel. This ensures that streaming data remains private and that your IP address appears as the server’s rather than your physical location. It’s a convenient way to access geo‑restricted libraries without installing additional apps.
When streaming, remember to check the VPN’s bandwidth limit. Some free or low‑tier plans impose caps that might interrupt your session. If you notice frequent disconnections, consider switching to a paid plan or a different server location with higher throughput.
Configuring a Third‑Party VPN for Advanced Features
While Apple’s native VPN supports standard protocols, certain advanced features like split tunneling or DNS leak protection are only available through third‑party apps. To access these, install a reputable VPN provider from the App Store, such as ExpressVPN, NordVPN, or Surfshark. These apps provide graphical interfaces and auto‑connect options that simplify daily use.
Once installed, sign into your account and allow the app to add a configuration profile. The app will prompt you to enable the VPN on your device, which may require you to go to Settings > General > VPN to complete the setup. After installation, you can choose the desired server and protocol from within the app’s dashboard.
Many premium apps also support kill‑switch functionality, which cuts all network traffic if the VPN connection drops. This ensures that your data never leaks to the open internet. If your workflow demands high security, enabling a kill switch is strongly recommended.
Using the Built‑in VPN with Apps that Require Custom DNS
Some applications, especially those in the developer or enterprise space, require custom DNS settings to function properly. Apple’s native VPN allows you to specify DNS servers in the configuration profile. Open the VPN configuration you added earlier, scroll to DNS, and enter the IP addresses of your preferred DNS provider.
For example, you might use Cloudflare’s 1.1.1.1 or Google’s 8.8.8.8 for faster resolution. Specifying these servers ensures that even if the VPN’s default DNS is blocked, your device can still resolve domain names. This is particularly useful when traveling to regions with strict censorship.
After updating the DNS settings, tap Done and reconnect the VPN. The new DNS configuration will take effect immediately, and you can verify that DNS requests route through the VPN by using online DNS leak test tools.
Managing VPN Profiles and Connections
If you maintain multiple VPN profiles, such as a work VPN and a personal streaming VPN, you can switch between them with a single tap. Go to Settings > General > VPN and tap the i icon next to each profile. From there, you can rename, delete, or change the priority of your connections.
For users who rely on a daily VPN connection, you can set up Auto‑Connect in the profile settings. This feature automatically connects the VPN when you enter a specified location or network. It’s a powerful tool for ensuring consistent privacy without manual intervention.
When troubleshooting connectivity issues, start by toggling the VPN off and on again. If the problem persists, reset the network settings by navigating to Settings > General > Reset > Reset Network Settings. This action clears Wi‑Fi passwords and VPN configurations, so be sure to back up any important data first.
Using the Built‑in VPN with Cloudflare’s Learning Resources
Cloudflare’s learning platform offers in‑depth explanations of how VPNs work and how to configure them correctly. Reviewing their tutorials can help you understand the nuances of encryption, tunneling, and DNS leak protection, which are essential for maximizing the built‑in VPN’s effectiveness.
By following Cloudflare’s guides, you’ll learn best practices for selecting secure protocols, configuring split tunneling, and monitoring bandwidth usage. These skills are invaluable for professionals who need to maintain secure remote access to corporate resources.
Cloudflare’s educational resources also cover advanced topics such as zero‑trust networking and the role of edge computing in VPN performance. Incorporating this knowledge into your daily VPN use can elevate your overall security posture.
Using the Built‑in VPN to Protect Public Wi‑Fi Connections
Public Wi‑Fi networks are notorious for security vulnerabilities, making them ideal targets for attackers. When connecting to a coffee shop or airport network, immediately activate your built‑in VPN. The encrypted tunnel safeguards all traffic, preventing eavesdroppers from intercepting sensitive data like passwords or credit card numbers.
Apple’s native VPN also supports Wi‑Fi Assist, a feature that switches to cellular data when the Wi‑Fi signal is weak. If you have a VPN profile configured, Wi‑Fi Assist will maintain the VPN connection across both Wi‑Fi and cellular networks, ensuring continuous protection.
For an added layer of security, enable Private Relay if you’re on iOS 16 or later. This feature hides your IP address from websites and services while still allowing your VPN to encrypt traffic. Together, these settings provide robust defense against local network attacks.
Using the Built‑in VPN with Remote Desktop Applications
Many professionals use remote desktop apps like Microsoft Remote Desktop or TeamViewer to access corporate resources. By routing the connection through the built‑in VPN, you add an extra shield that protects your session from interception. First, establish the VPN connection, then launch your remote desktop client.
Within the remote desktop app, choose the Advanced or Connection Settings to specify whether you want to use the VPN’s DNS. Ensuring that all traffic—including authentication exchanges—passes through the VPN reduces the risk of credential theft.
When working remotely, also consider using a VPN with split tunneling if you need to access both internal and external resources. Some apps allow you to specify which URLs should bypass the VPN. This can improve performance while retaining security for critical connections.
Using the Built‑in VPN to Access Restricted Government Portals
Government portals often have strict access controls that can block traffic from unfamiliar IP ranges. By connecting to a VPN server in the same country, you can bypass these restrictions and access services like tax filing or business registration. Simply enable the VPN before launching the portal’s web interface.
When accessing government services, always verify that the portal’s SSL certificate is valid. The VPN only encrypts the traffic; it does not replace the need for standard HTTPS security checks. Ensuring a valid certificate helps guard against phishing attacks.
If you encounter a “connection timed out” error, double‑check that your VPN is active and that the server is not overloaded. Switching to a different server or using a dedicated VPN app with higher bandwidth can resolve these issues quickly.
Using the Built‑in VPN with IoT Devices
Internet of Things (IoT) devices on your home network can be vulnerable to hacking. While Apple’s VPN primarily protects your phone, you can create a personal hotspot that routes all connected devices through your iPhone’s VPN. Activate Personal Hotspot in Settings, then enable the VPN. All devices tethered to the hotspot will inherit the encrypted tunnel.
Alternatively, if your router supports VPN passthrough, you can connect your VPN provider’s router directly to the home network. This approach secures every device, including smart TVs and speakers, without modifying individual settings.
For a comprehensive solution, consider a VPN router that supports advanced features such as DNS leak protection and automatic failover. This ensures that all traffic remains secure, even if your primary VPN provider experiences downtime.
Using the Built‑in VPN for Privacy‑Focused Browsing
When you want to browse the internet anonymously, the built‑in VPN can mask your real IP address. After enabling the VPN, launch Safari or Chrome. Your traffic will be routed through the VPN server, hiding your location from websites and third‑party trackers.
To further enhance privacy, combine the VPN with a privacy‑oriented browser like Brave or Firefox. These browsers include built‑in tracker blockers and anti‑fingerprinting features that complement the VPN’s encryption.
Regularly clearing your browser history and cookies can also reduce tracking. With the VPN protecting the transport layer, the combined effect offers a robust shield against both passive and active surveillance.
Using the Built‑in VPN to Bypass Geographical Content Restrictions
Streaming services such as Netflix, Disney+, and Hulu often block content based on your geographic location. By selecting a VPN server in a country where the desired content is available, you can stream it without any additional software.
Remember that streaming platforms actively block VPN IP ranges. If you encounter a blockage, switch to a less popular server or use a dedicated streaming VPN that maintains a list of working IPs.
Additionally, you can enable Private Relay for a more discreet browsing experience. Private Relay anonymizes your IP for most websites while preserving the ability to access local services when necessary.
Using the Built‑in VPN to Protect Remote Work Accounts
Employees often need to access corporate networks and applications from home or public locations. Connecting to the corporate VPN via the built‑in settings ensures that all data transmitted to the office is encrypted and secure. The VPN also authenticates you against the company’s directory services.
When multiple VPNs are configured, set the corporate VPN as the default connection in the VPN profile settings. This guarantees that all traffic routes through the corporate tunnel unless explicitly overridden.
If you experience latency or disconnections, consider using the high‑speed VPN servers offered by your provider. Many companies partner with high‑bandwidth partners to deliver consistent performance for remote workers.
Using the Built‑in VPN with VPN‑Capable Apps
Some apps, like ProtonMail or Signal, integrate their own encryption mechanisms. When using a VPN in addition to these apps, you add a second layer of security. This is especially useful for communications that require end‑to‑end encryption combined with traffic anonymization.
Enable the VPN before launching the app to ensure that the app’s traffic is encrypted from the moment it leaves your device. This practice protects against local network attacks and reduces the risk of data leakage.
For apps that support VPN bypass, you can configure them to route only specific traffic through the VPN. This reduces bandwidth usage while maintaining privacy for sensitive data.
Using the Built‑in VPN with File Transfer Services
When uploading or downloading large files, the built‑in VPN protects your data from being intercepted. After connecting to the VPN, launch your preferred file transfer client (e.g., iCloud Drive, Dropbox, or a web-based service). All file traffic will flow through the encrypted tunnel.
For better performance, select a VPN server close to your destination server. Lower latency reduces upload times, while the encrypted tunnel keeps your data secure during transit.
When transferring files that require compliance with regulations such as GDPR or HIPAA, verify that your VPN provider maintains logs in compliance with those standards. Using a privacy‑focused provider helps avoid regulatory complications.
Using the Built‑in VPN to Protect Against ISP Throttling
Internet Service Providers (ISPs) may throttle traffic during peak hours or for bandwidth‑heavy activities like streaming or gaming. A VPN masks your activity from the ISP, making it harder for them to identify and throttle specific traffic types.
After connecting to a VPN, monitor your download and upload speeds. If you notice a significant improvement, the VPN is effectively countering throttling. Some VPN providers offer speed‑boost servers optimized for high‑bandwidth tasks.
Keep in mind that some ISPs may still detect VPN traffic and throttle it. In such cases, switching to a different protocol or a more aggressive server may help maintain consistent speeds.
Using the Built‑in VPN with Gaming Consoles
While iPhones can’t directly route console traffic through the device, you can create a personal hotspot that includes the VPN. Connect your console to the hotspot, and all game data will travel through the iPhone’s VPN tunnel. This approach protects your gaming credentials from local network snooping.
Alternatively, set up a VPN on your home router and connect your console to the router. This method offers a more stable connection and eliminates the need for a personal hotspot.
For games that rely on real‑time connectivity, such as multiplayer titles, use a VPN server with low ping times to reduce latency and improve gameplay experience.
Using the Built‑in VPN to Secure VoIP Calls
Voice over IP (VoIP) calls are often vulnerable to eavesdropping if transmitted over unsecured networks. By enabling the built‑in VPN, you ensure that your VoIP traffic is encrypted end‑to‑end, protecting both the call and any associated metadata.
When using services like FaceTime, WhatsApp, or Skype, the VPN will encrypt the data before it leaves your device. This is critical when making sensitive calls from public Wi‑Fi or during remote work sessions.
For businesses that rely on VoIP for customer support, consider integrating the VPN with the PBX system. This adds an extra layer of encryption, ensuring that customer calls remain private.
Using the Built‑in VPN for Secure Email Access
Accessing corporate email over public networks can expose login credentials to attackers. By connecting to the VPN before logging into your email client, you protect authentication tokens and encrypted mail from interception.
Set your email app to always use a secure connection (SSL/TLS). Combined with the VPN, this guarantees that all mail traffic remains confidential and tamper‑proof.
When you need to access email from a remote location, verify that the VPN connection is active before opening any attachments. This reduces the risk of malware infiltration through compromised emails.
Using the Built‑in VPN with Mobile Payment Apps
Payments made through apps such as Apple Pay or Google Wallet transmit sensitive card data. By routing the connection through the VPN, you add an extra encryption layer, protecting the data from local eavesdroppers.
Enable the VPN before making a purchase, especially when using public Wi‑Fi. The VPN ensures that the transaction data never leaves your device in an unencrypted form.
After the purchase, monitor your bank statements for any unauthorized charges. If suspicious activity occurs, change your passwords and report the incident immediately.
Using the Built‑in VPN with Cryptocurrency Transactions
Cryptocurrency wallets and exchanges are prime targets for hackers. Before executing trades or transferring funds, connect to a VPN to obfuscate your IP and protect against tracking.
Use a reputable VPN that does not log activity. Many crypto‑focused VPNs advertise zero‑logging policies to enhance privacy.
Additionally, use two‑factor authentication (2FA) on all wallets and exchanges. Even with a VPN, 2FA adds an essential security layer.
Using the Built‑in VPN to Bypass Ad‑Blocking Restrictions
Some streaming services block users who employ ad‑blocking tools. By connecting to a VPN, you can circumvent these restrictions while still enjoying a cleaner browsing experience.
After enabling the VPN, clear your browser cache and restart the streaming app. The new IP address should bypass the ad‑blocker detection.
If the service still blocks the VPN IP, switch to a less‑popular server or consider a dedicated streaming VPN that regularly updates its IP list.
Using the Built‑in VPN to Manage Multiple Accounts
When you manage accounts on platforms that limit concurrent sessions, such as social media or streaming services, a VPN can help. By connecting to different servers for each account, you can avoid detection of simultaneous logins.
For example, log in to Instagram from a server in the US for one account, and switch to a server in Canada for another. The platform sees each login as coming from a distinct location.
Always log out properly when finished. This practice prevents account lockouts and maintains compliance with the platform’s terms of service.
Using the Built‑in VPN with Email Spam Filters
Email spam filters rely on IP reputation. When sending emails from a corporate network, the VPN’s IP address may be more reputable than a dynamic home IP. This can reduce the likelihood of your messages landing in spam folders.
Set the VPN to a server that has a clean reputation. Many VPN providers publish lists of IPs that are whitelisted by major email services.
Monitor your email deliverability after configuring the VPN. If you notice issues, try a different server or contact the VPN support team for assistance.
Using the Built‑in VPN to Secure Smart Home Devices
Smart home devices are often exposed to the internet. By using a VPN‑capable router or a personal hotspot, you can encrypt traffic between your devices and the internet.
Configure your router’s VPN settings to ensure that all outbound traffic, including device firmware updates, is encrypted. This protects against firmware hijacking and unauthorized access.
Regularly update your device firmware and monitor network logs for unusual activity. The VPN helps to isolate malicious traffic before it reaches your home network.
Using the Built‑in VPN with VPN‑Capable IoT Devices
Some IoT devices, such as smart cameras, offer native VPN support. Pair the device’s VPN configuration with your iPhone’s VPN profile to create a mesh of encrypted connections throughout your network.
Configure the device to connect to the same VPN server as your iPhone. This ensures consistent encryption across all traffic streams.
For advanced security, enable device-level firewalls and monitor logs for any unauthorized access attempts.
Using the Built‑in VPN to Protect Against DNS Spoofing
DNS spoofing attacks can redirect users to malicious sites. By specifying a secure DNS server in the VPN profile, you can mitigate these risks. Use reputable DNS providers like Cloudflare or Google that offer built‑in DNSSEC validation.
Enable DNS leak protection in the VPN settings to ensure all DNS queries go through the encrypted tunnel. Many VPN apps include this feature by default.
Test your configuration with online DNS leak detection tools to confirm that your queries remain private.
Using the Built‑in VPN for Secure Video Conferencing
Video conferencing platforms, such as Zoom or Microsoft Teams, can be vulnerable to packet sniffing. By enabling the built‑in VPN, you encrypt the entire data stream, safeguarding meeting content and participant data.
Before joining a call, connect to the VPN. Once the connection is established, start the meeting as usual.
To further enhance security, use the platform’s built‑in encryption features and avoid sharing the meeting link publicly.
Using the Built‑in VPN to Secure Software Updates
Operating system and application updates can be intercepted if transmitted over unsecured networks. The VPN ensures that these updates are downloaded over an encrypted channel.
Enable the VPN before initiating any large downloads or updates. Verify the integrity of the downloaded files using checksums if available.
Regularly update your VPN application to benefit from the latest security patches and performance improvements.
Using the Built‑in VPN for Secure Online Banking
Online banking portals transmit sensitive financial data. By connecting to the VPN, you shield this data from potential attackers on the same network.
Activate the VPN before logging into your banking app. Verify that the site’s SSL certificate is valid and that the URL begins with https://.
After completing your transactions, log out and disconnect the VPN to maintain a minimal footprint.
Using the Built‑in VPN to Protect Your Privacy from ISPs
ISPs can monitor user activity and sell data to third parties. The built‑in VPN hides your browsing habits, preventing your ISP from seeing which sites you visit.
Always use the VPN when accessing sensitive information or when traveling to regions with strict data surveillance.
When you need to share your location or use GPS features, disable the VPN briefly to maintain accurate mapping data.
Using the Built‑in VPN to Safeguard Your Health Data
Health apps store personal medical information that must remain confidential. By connecting to a VPN, you ensure that any transmitted data is encrypted and protected from unauthorized access.
Choose a VPN provider that complies with privacy regulations like HIPAA or GDPR. Verify that the provider’s terms explicitly mention compliance with these standards.
Periodically review the security settings within your health app, and keep your operating system updated to mitigate vulnerabilities.
Using the Built‑in VPN with Cloud Storage Services
When accessing cloud storage, the VPN encrypts the data between your device and the cloud provider. This reduces the risk of data interception by third parties.
Activate the VPN before uploading or downloading files. Ensure that the cloud service uses TLS encryption for an additional layer of protection.
For large uploads, consider using a dedicated VPN server with high bandwidth to maintain performance.
Using the Built‑in VPN to Prevent Location Tracking
Mobile apps often request location data to personalize content. A VPN can mask your actual geographic location from these apps, reducing the amount of data collected.
Enable the VPN before launching any location‑based services. Keep the app’s location permissions to the minimum required for functionality.
Review the app’s privacy policy and use built‑in iOS features to control which apps can access your location.
Using the Built‑in VPN to Protect Your Children’s Online Activities
Parents can use the VPN to shield their children’s devices from malicious content and tracking. By routing all traffic through the VPN, you can monitor and filter the data flow.
Set up a parental control app that works alongside the VPN to enforce safe browsing policies.
Regularly update both the VPN and parental control software to maintain compatibility and security.
Using the Built‑in VPN to Manage Remote Access for IT Teams
IT teams often require remote access to internal systems. The built‑in VPN enables secure connections without needing separate VPN client software.
Configure a dedicated VPN profile with multi‑factor authentication to meet corporate security policies.
Document the connection procedure for new team members to streamline onboarding and reduce support calls.
Using the Built‑in VPN to Enhance Personal Data Backup
When backing up data to cloud services, the VPN ensures that the backup traffic remains confidential.
Set your backup software to use the VPN connection automatically. Verify that the backup provider uses TLS encryption for data in transit.
Regularly test your backups by restoring a sample file to ensure data integrity and encryption integrity.
Using the Built‑in VPN for Secure Online Shopping
Online shopping involves transmitting credit card information and personal details. By enabling the VPN, you protect these sensitive transactions from eavesdropping.
Make sure the e‑commerce website uses a secure HTTPS connection. The VPN adds another layer of encryption beyond the site’s SSL.
After completing the purchase, review your transaction history and monitor for fraudulent activity.