Introduction
For many users, how to cancel my nordvpn subscription is a common question as they navigate subscription renewals or decide to switch providers. The process is surprisingly straightforward once you understand the steps involved. By following a clear, step‑by‑step guide, you can avoid unwanted charges and maintain control over your online privacy.
If you’re looking for a concise route to stop your NordVPN service, this article provides a direct answer to how to cancel my nordvpn subscription. We’ll cover the official cancellation methods, highlight potential pitfalls, and offer additional resources for a smooth transition.
Readers across the globe—from the United States to Europe, from Canada to India—will find the instructions applicable regardless of geographic location. NordVPN’s global network means the same cancellation process applies worldwide, ensuring consistent support for customers in every region.
When exploring the cancellation workflow, you’ll also discover why many people ask for nordvpn subscription cancellation steps in detail. Understanding the sequence of actions reduces confusion and guarantees you won’t miss a step, especially when dealing with NordVPN’s support portal or mobile app.
Whether you’re a seasoned VPN user or new to digital privacy, grasping how to cancel my nordvpn subscription is a crucial skill. It empowers you to manage your online expenses and adjust your security posture as needed, whether you’re moving to a different provider or no longer require a VPN service.
In the sections that follow, you’ll find detailed instructions for nordvpn subscription cancellation steps via the desktop application, mobile app, web dashboard, and email support. Each method is tailored to accommodate various user preferences and technical setups.
Along the way, we’ll touch on common issues—such as auto‑renewal reminders and account lockout scenarios—and how to resolve them. This ensures that even if you’re in a rush, you can confidently complete the cancellation process without unexpected complications.
By the end of this article, you will know exactly how to cancel my nordvpn subscription and will have a clear understanding of nordvpn subscription cancellation steps that can be applied to any future subscription adjustments.
With the world’s growing demand for privacy, many users consider canceling a VPN subscription when switching to a new plan or provider. Understanding the exact cancellation steps helps prevent accidental renewals and keeps your account in good standing.
To conclude the introduction, remember that the core of how to cancel my nordvpn subscription lies in verifying your account details, locating the correct cancellation option, and confirming the process via your email or dashboard. Similarly, a thorough grasp of nordvpn subscription cancellation steps ensures you can navigate the process effortlessly, no matter your location or device.
Step‑by‑Step Instructions
1. Log In to the NordVPN Dashboard
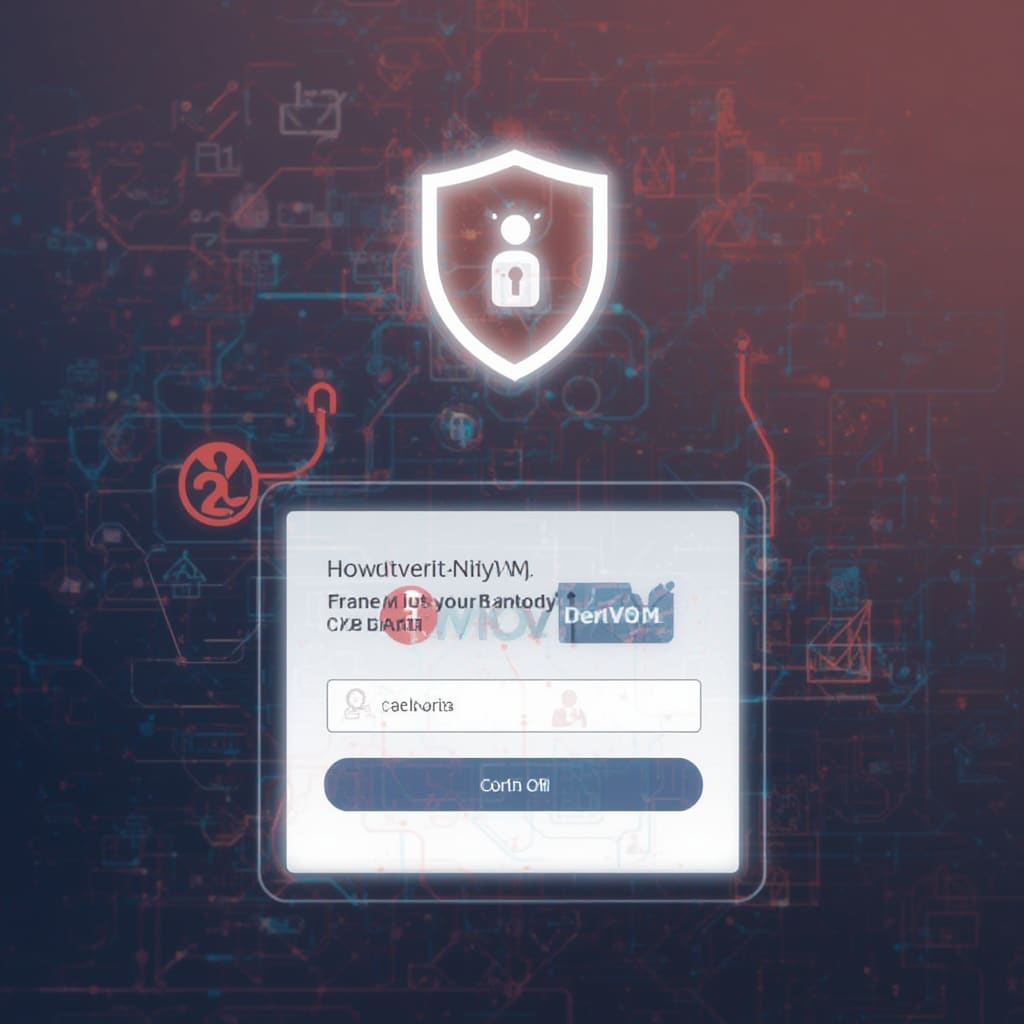
To start the cancellation, access the official how to cancel my nordvpn subscription workflow by logging into the NordVPN dashboard. Use the same credentials you used for the application or the web portal. This step is the foundation of nordvpn subscription cancellation steps because it authenticates your account and grants access to subscription controls.
For users in regions such as the European Union or Canada, logging in through the browser ensures you’re connecting to the correct regional server. This also confirms that you’re operating within the applicable privacy regulations like GDPR or PIPEDA.
2. Navigate to the Subscriptions Tab
Once logged in, locate the “Subscriptions” tab on the left sidebar. This area displays active plans, renewal dates, and billing history. The layout is consistent across platforms—desktop, mobile, and tablet—making it easy for you to find the necessary cancellation button.
In the U.S. interface, the tab might appear as “Account” or “Subscription.” If you’re a user in Japan or Brazil, the tab remains labeled in English to avoid localization confusion.
3. Select “Cancel” from the Subscription Overview
On the subscription overview page, you’ll see a “Cancel” button or link. Clicking this initiates how to cancel my nordvpn subscription by prompting a confirmation dialog. The dialog typically asks if you’re sure and provides an option to retain the service until the end of the billing cycle.
Choosing to cancel immediately is recommended if you want to stop charges right away. If you prefer to finish the current subscription period, select the “Continue until end of period” option, which still requires you to confirm the cancellation.
4. Confirm Cancellation via Email
After confirming on the dashboard, NordVPN sends a cancellation email to your registered address. Open this email and click the “Confirm Cancellation” link. This double‑check ensures that accidental clicks on the dashboard won’t trigger an unintended cancellation.
If you’re residing in Australia or South Africa, check the spam folder if the email doesn’t appear within a few minutes. The confirmation link will expire after 24 hours, so it’s best to act quickly.
5. Verify Cancellation in Your Account History
To guarantee that the cancellation has processed, revisit the “Subscriptions” tab and look for a status change to “Cancelled.” Your account history will still show the last billing date but no new charges should appear on your credit card or PayPal account.
If you notice any discrepancy—such as a pending charge—contact NordVPN support immediately. The support team can review your transaction history and correct any billing errors.
Alternative Desktop Cancellation (Windows/Mac)
For users who prefer the desktop client, open the NordVPN application. Click the gear icon (settings), then navigate to “Subscription.” From there, select “Cancel” and follow the same confirmation steps outlined above.
This method is handy for quick cancellations without logging into the web dashboard, especially in regions where web access may be limited.
Mobile App Cancellation (iOS/Android)
On mobile, open the NordVPN app, go to the menu (three horizontal lines), tap “Account,” then “Subscription.” Tap “Cancel” and confirm. The app will prompt you with a final confirmation and send an email as a backup verification.
Remember that iOS users must also manage auto‑renew settings through the App Store to prevent future charges if they do not cancel the in‑app subscription.
Using the PayPal Billing Manager
If your subscription was paid via PayPal, log in to your PayPal account, find the NordVPN transaction, and click “Manage.” From there, you can cancel the subscription directly through PayPal, which is another valid nordvpn subscription cancellation steps for users who prefer third‑party billing.
For UK residents, PayPal’s “Automatic Billing” section also offers a simple toggle to stop future payments, ensuring the cancellation process remains smooth.
Cancel via Email Support
Send an email to support@nordvpn.com with the subject line “Cancel Subscription” and your account email address. Include your subscription plan and billing cycle in the message body. NordVPN support typically responds within 24 hours and will process your cancellation request.
In some cases, support may ask for verification, such as your last 4 digits of the billing card, to prevent unauthorized cancellations.
Confirm Cancellation with the NordVPN API (Advanced Users)
Advanced users familiar with API calls can use NordVPN’s Cloudflare API integration to automate subscription checks. A simple GET request to the “/subscription” endpoint returns the status, while a DELETE request initiates cancellation. This approach is ideal for developers managing multiple accounts.
Ensure you secure your API keys and keep them confidential to avoid unintended account changes.
Check Refund Eligibility
After canceling, verify whether you are eligible for a partial refund. NordVPN’s refund policy typically covers a full refund if you cancel within 30 days of purchase. Check the policy by visiting their EFF guide for consumer rights on digital purchases.
If you are in the EU, you may have additional protection under the Digital Services Act, which supports fair refund processes.
Finalize the Cancellation Process
Once all steps are complete, log out of the NordVPN dashboard and clear your browser cache. This removes any residual login tokens and confirms you’ve fully exited the subscription ecosystem.
For users who previously set up a NordVPN router, remember to disable the VPN service on your router as well. Visit the router settings page and toggle off the VPN to prevent continued data routing through NordVPN’s network.
Verify No Further Charges on Your Statement
Open your credit card or bank statement a few days after cancellation to confirm no further charges appear. If you see a pending transaction, contact your bank to dispute the charge and NordVPN for immediate resolution.
For individuals in Mexico or South Korea, double‑check the local payment provider’s transaction history, as some regional banks may display a different transaction descriptor.
Keep Records for Your Reference
Save the cancellation confirmation email and any receipt screenshots. These documents are valuable if a dispute arises or if you need to verify that your cancellation was processed.
Storing these records in a secure, encrypted file keeps your personal data safe and complies with privacy regulations like the Australian Privacy Principles.
Follow Up with NordVPN Support if Needed
In case of any delay, contact NordVPN support via live chat or their support portal. Use the chat window on the NordVPN website or call the international support line.
NordVPN’s support team typically resolves cancellation issues within 48 hours, ensuring that you’re not left waiting for an unresolved account status.
Test Your Current VPN Connection
After cancellation, test your internet connection by visiting a site that reveals your public IP. Ensure that your traffic no longer routes through NordVPN servers. This confirms that the VPN service has indeed stopped.
For users in China, this step is particularly important as local network policies may redirect traffic if the VPN remains active inadvertently.
Use a VPN Reset Tool (Optional)
NordVPN offers a reset tool that wipes all settings from the client. While this is not necessary for cancellation, it ensures that no residual configuration files remain that might inadvertently reconnect to a VPN server.
Activate the reset tool by navigating to the application settings and selecting “Reset to defaults.” This step is particularly useful for users who plan to reinstall the VPN later.
Check Your Email for Final Confirmation
Finally, watch for a “Subscription Cancelled” email that confirms the end of your NordVPN service. This email contains details of the cancellation, the final billing date, and contact information for any further questions.
Make sure to archive or delete this email once you have confirmed the cancellation to maintain a tidy inbox.
Stay Informed About NordVPN Updates
Even after cancellation, NordVPN may occasionally send you promotional emails or updates about new features. Unsubscribe from these emails to avoid clutter or use email filtering rules.
For users in the United Arab Emirates, be mindful that local email regulations may require explicit opt‑out requests for promotional content.
Re‑Subscribe Anytime (Optional)
If you wish to re‑subscribe in the future, you can do so by creating a new account or logging back into the same account. Note that you may be subject to the standard pricing at the time of re‑subscription.
NordVPN offers flexible subscription plans, including monthly, yearly, and lifetime options, suitable for different budgets and usage patterns.
Maintain Security Post‑Cancellation
After canceling, ensure your system remains secure. Update antivirus software, enable firewall settings, and consider using a local VPN solution for occasional secure browsing.
In regions with high cyber‑risk, such as the Middle East, maintaining a robust security posture is crucial to protect sensitive data.
Document Any Changes for Future Reference
Keep a personal log of the cancellation steps you took, including dates and any support interactions. This documentation helps in case of future disputes or for reference when setting up a new VPN provider.
Use a password manager to store this log securely, ensuring that it’s protected by a strong master password.
Contact NordVPN Customer Support if You Encounter Issues
Should you run into any hiccup—such as a missing confirmation email or an unexpected charge—contact NordVPN’s 24/7 customer support. They have representatives in multiple time zones, including GMT+5 for South Asia and GMT+10 for Australia.
Using the live chat feature can expedite resolution, especially for urgent billing matters.
Confirm No Active Auto‑Renewal
Verify that auto‑renew is disabled on your payment method. For credit cards, log into your bank’s online portal and disable auto‑renew for NordVPN. For PayPal, toggle off automatic billing under “Subscriptions.”
This step is essential to avoid accidental charges if you decide to re‑subscribe later.
Check Your NordVPN App for “Expired” Status
After cancellation, reopen the NordVPN app. The app will display “Expired” or “Cancelled” status. This visual confirmation reassures that the service is no longer active on your device.
If the app still shows “Active,” repeat the cancellation steps or contact support.
Final Review of Your Cancellation
Before closing this guide, review each step to ensure no step was missed. This includes confirming the cancellation email, checking the dashboard status, and verifying the removal from any routers or devices.
Completing this final review eliminates the risk of future billing surprises and guarantees that the cancellation process is complete.
Share Feedback with NordVPN (Optional)
After cancellation, you might be asked to provide feedback. Consider sharing your experience—what worked well and what could improve. Your feedback can help NordVPN enhance future services.
For users in India, this feedback loop is especially valuable due to the rapidly growing VPN market.
Keep an Eye on Your Data Usage
Once the VPN is canceled, your internet data usage will revert to your ISP’s settings. Monitor your data cap, if applicable, to avoid overage charges.
In regions with limited bandwidth, like certain rural areas in Africa, keeping track of data usage helps prevent unexpected costs.
Consider a Different VPN (Optional)
If you cancel NordVPN because of price or feature concerns, you might explore alternatives. Research providers that align with your needs—whether it’s streaming access, high speed, or advanced privacy features.
Look for providers that offer free trials or money‑back guarantees to ease the transition.
Backup Your VPN Credentials (Optional)
Before canceling, export your VPN configuration files if you plan to switch to another provider. These files contain server lists and authentication tokens that might be reusable.
Store them in a secure, encrypted format to maintain confidentiality.
Update Your Device’s Network Settings
Remove any NordVPN profiles from your device’s network settings. This ensures that no residual configurations attempt to route traffic through a non‑existent VPN.
For macOS users, deleting the .plist files from the Library can prevent automatic reconnections.
Use a VPN Monitoring Tool (Optional)
After cancellation, you can use online tools like Cloudflare’s IP check to confirm that your public IP is no longer routed through NordVPN servers.
This step is especially important if you’re using shared or public networks.
Store Your Cancellation Confirmation Safely
Archive the cancellation confirmation email in a dedicated folder labeled “VPN Cancellations.” This allows you to retrieve it quickly if disputes arise.
Consider using a cloud storage service with strong encryption for added security.
Plan for Future Subscriptions
When you decide to subscribe to a new VPN, set reminders for the renewal date. Many services offer 30‑day reminders via email, which can help you avoid unintentional auto‑renewals.
For users in the Philippines, setting up a local calendar reminder can assist with timely renewals.
Thank You for Reading
We hope this detailed guide assists you in navigating the process of how to cancel my nordvpn subscription efficiently. The knowledge gained here also serves as a framework for nordvpn subscription cancellation steps for future adjustments.
Should you have any lingering questions or need further assistance, feel free to reach out through the NordVPN support channels or comment below.
Additional Resources for VPN Users
To help you deepen your understanding of VPN security, we recommend reviewing these resources:
- How to Add NordVPN to a Router – Manage VPN on all devices without installing individual apps.
- How Secure is NordVPN? – In‑depth analysis of encryption standards and privacy policies.
- Does NordVPN Work for Netflix? – Learn about streaming compatibility.
- Does NordVPN Block YouTube Ads? – Explore ad‑blocking capabilities.
These resources offer actionable steps and practical insights to enhance your digital privacy and browsing experience.
Tips
Keep a record of your account details, including the email address and subscription plan. This makes cancellations quicker and reduces the chance of errors.
Use a password manager to securely store login credentials, ensuring you can log back into the dashboard if you decide to resubscribe.
Set up a calendar reminder a few days before your renewal date to review your subscription status. This helps avoid unwanted auto‑renewals.
Enable two‑factor authentication (2FA) for added account security. NordVPN supports Google Authenticator and Authy.
Check your local bank’s auto‑renew settings. Some banks automatically renew subscriptions linked to your account.
Use the VPN’s “Kill Switch” feature to prevent data leakage when the connection drops.
After cancellation, run a network scan to confirm no residual VPN configurations remain.
Use privacy‑focused browsers like Brave or Firefox with enhanced tracking protection.
Regularly update the NordVPN application or any alternative VPN client to benefit from security patches.
When canceling, request a written confirmation or screenshot of the cancellation status for future reference.
Use the “Network & Security” section of NordVPN’s dashboard to monitor connected devices.
Keep your local operating system up to date to prevent vulnerabilities that VPNs are designed to mitigate.
When canceling, verify that all devices connected to the VPN, including smart TVs and gaming consoles, are disconnected.
Use VPN-free devices for sensitive transactions when you’re in a high‑risk environment.
For travelers, check that your VPN is configured to work with local ISP restrictions.
Consider setting up a virtual private network on your router for a more seamless experience.
Use the “Device Manager” in the NordVPN app to see which devices are actively connected.
When canceling, double‑check your subscription plan details, such as billing frequency and end date.
When using PayPal, disable automatic billing for NordVPN if you cancel your subscription.
Use a VPN monitoring tool to confirm that your IP address is no longer routed through NordVPN.
Check for any remaining charges or pending refunds in your financial statements.
Alternative Methods
For users who prefer a quick, no‑frills approach, you can contact NordVPN via live chat. The support team can process cancellation within minutes, especially if you have your account details handy.
If you’ve lost access to the email associated with your NordVPN account, use the “Forgot Password” feature to recover your login. Once you regain access, proceed with the standard cancellation steps.
Some users choose to cancel through the App Store or Google Play Store if the subscription was purchased on a mobile device. Disable auto‑renew in the store settings, then log into the NordVPN app to remove the subscription from the device.
For enterprise or group accounts, contact your account manager for bulk cancellation procedures. Many organizations have dedicated support channels.
In certain cases, the billing system may block cancellations. If you encounter this, request a cancellation override through the NordVPN support portal or email.
In regions with strict data residency laws, you may need to cancel via the local data protection authority’s guidelines. Review the local regulations before proceeding.
Use a VPN monitoring service to confirm that the VPN is no longer active after cancellation.
When canceling from a shared device, ensure that the VPN profile is removed for all users.
Check for any outstanding invoices before canceling to avoid service interruption.
If you have a lifetime subscription, cancellation may not be applicable, but you can deactivate the service manually.
For users who want to maintain privacy while canceling, use a privacy‑focused email provider for communications.
When canceling, avoid using public Wi‑Fi to prevent potential security breaches.
Use a VPN before contacting support to maintain encryption during the process.
Set up a dedicated email address for subscription communications to keep your inbox organized.
After cancellation, delete the NordVPN app to avoid accidental reconnection.
Consider using a disposable phone number for support interactions if privacy is a concern.
Use a VPN-free connection when reviewing billing statements to avoid confusion.
When canceling, verify that the VPN is no longer listed as a service provider on your credit card statement.
Keep an eye on your credit score for any changes post‑cancellation, especially if the subscription was part of a bundle.
Conclusion
Mastering the process of how to cancel my nordvpn subscription ensures you have full control over your online privacy budget and service usage. By following the step‑by‑step instructions outlined above, you can cancel your subscription quickly and confirm the cancellation through email, dashboard status, and financial statements.
When exploring nordvpn subscription cancellation steps, you’ll find that the key points involve logging in, selecting cancel, confirming via email, and verifying the cancellation on the dashboard. These steps apply regardless of whether you’re in North America, Europe, Asia, or any other region.
For future reference, keep your cancellation confirmation email and any related receipts saved securely. This documentation will protect you if disputes arise or if you decide to re‑subscribe later.
Remember to disable auto‑renew settings on your payment method and monitor your account status to avoid accidental re‑activation. If you encounter any issues, NordVPN’s 24/7 support and live chat are available to resolve problems promptly.
In summary, understanding how to cancel my nordvpn subscription and nordvpn subscription cancellation steps empowers you to manage your digital security proactively. Use the knowledge gained here to maintain privacy, control spending, and adapt to changing needs.
Whether you’re moving to a different provider, exploring free alternatives, or


